Many WordPress users struggle around this issue of WordPress line break not working. In this article, we discuss some of the possible ways to get around this issue.
1. Use empty classes in HTML Elements
You can make WordPress assume that your HTML elements contain certain attributes. This can be done by Adding attributes to the HTML elements with the use of empty classes. For example:
Avoid writing:
<p>
<br>
<span>
Instead, write:
<p class="">
<br class="">
<span class="">
2. Disable Autop formatting
The Autop() function in WordPress auto formats the paragraphs. The WordPress line break not working is due to the presence of a filter called “wpautop”. The “wpautop” filter executes whenever the content of a blog post is rendered.
We can easily use the remove_filter function to disable the wpautop filter. In the functions.php file you need to add the following code:
remove_filter ('the_content', 'wpautop');
If you use multiple themes, then you need to add this functionality as a plugin. You can place the code within a PHP file inside the /wp-content/plugins directory.
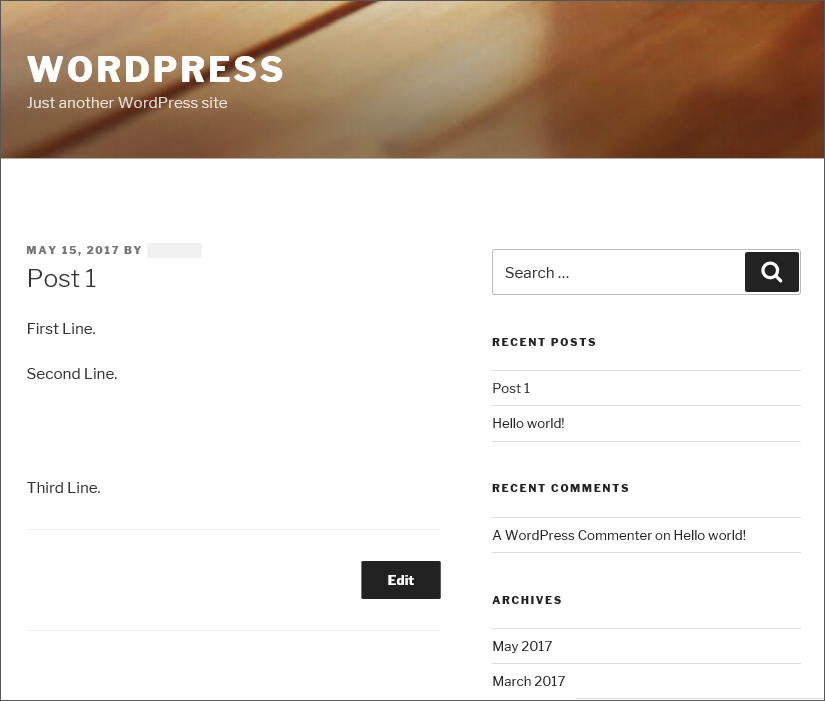
Published Post after Autop disabling
3. HTML br tag not working: Use TinyMCE Advanced plugin
WordPress has a built-in editor known as the “Visual” editor. At the backend, the editor uses open source editor named “TinyMCE”. If you switch between the Visual Editor and the HTML(Text) editor, the TinyMCE functionality executes a backend filtration process. During this process, the empty tags and the
tags are removed from the post.
tags are removed from the post.
The TinyMCE-Advanced plugin adds the option to disable the automatic removal of and
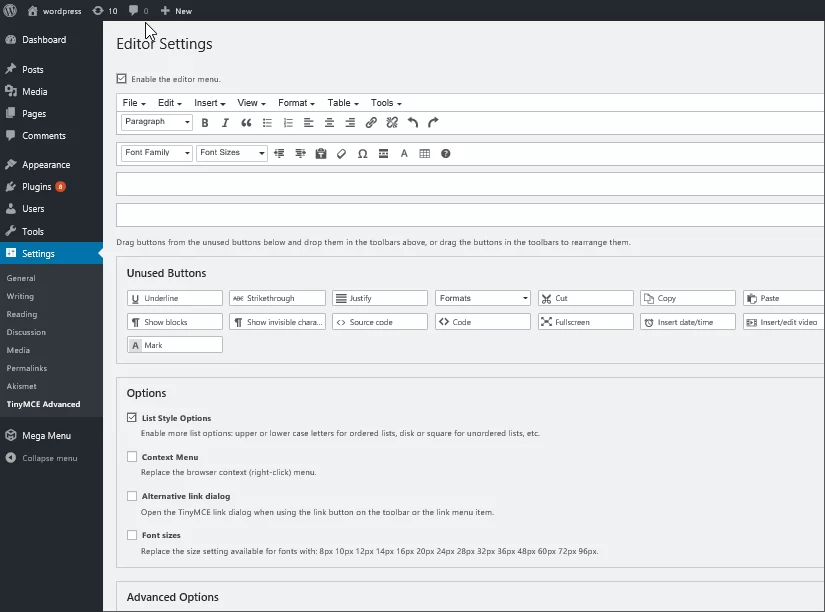
tags. The option to disable/enable WordPress line break is present in the Settings->TinyMCE Advanced panel.

5. Add a filter to replace
tags. The option to disable/enable WordPress line break is present in the Settings->TinyMCE Advanced panel.
Edit Post in Visual Editor without TinyMCE Advanced Plugin installed
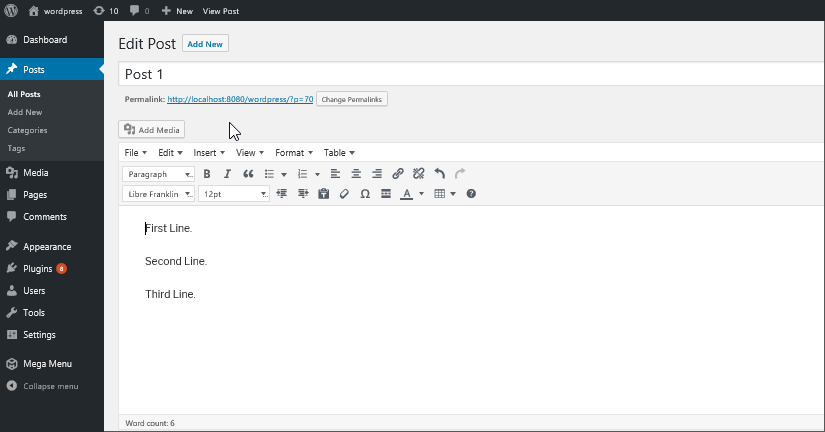
Edit Post in Visual Editor with TinyMCE Advanced Plugin installed and disabled auto removal of tags:
4. Work with the HTML Editor
This is an easy solution for people who are familiar with HTML. You can avoid working with the Visual editor and switch to the HTML mode in the WordPress editor. The HTML mode lets you control the output and allows you to add or remove line breaks. Just use the
tag wherever you want a line break inserted.
tag wherever you want a line break inserted.
5. Add a filter to replace
tag
Add a filter in the functions.php file which adds a clear attribute to the
tag. When the attribute is added, the
tag is not removed by WordPress.
tag. When the attribute is added, the
tag is not removed by WordPress.
function clear_br($content) {
return str_replace("<br/>","<br clear='none'/>", $content);
}
add_filter('the_content','clear_br');
Post before adding filter
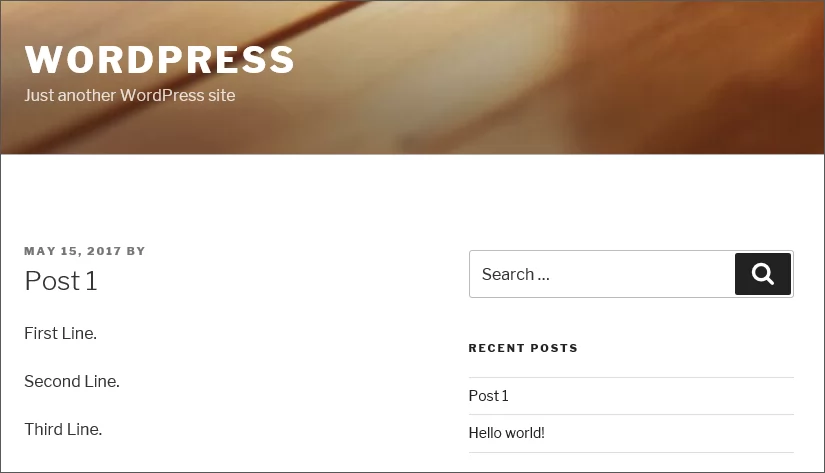
Published post after adding filter
6. Create a WordPress Line Break (br) Shortcode
You can add a shortcode to fix the line breaks not working issue in WordPress.
Insert the following shortcode code into the functions.php file:
function add_linebreak_shortcode() {
return '<br />';
}
add_shortcode('br', 'add_linebreak_shortcode' );
Now insert the shortcode shown below wherever you want to insert a space.
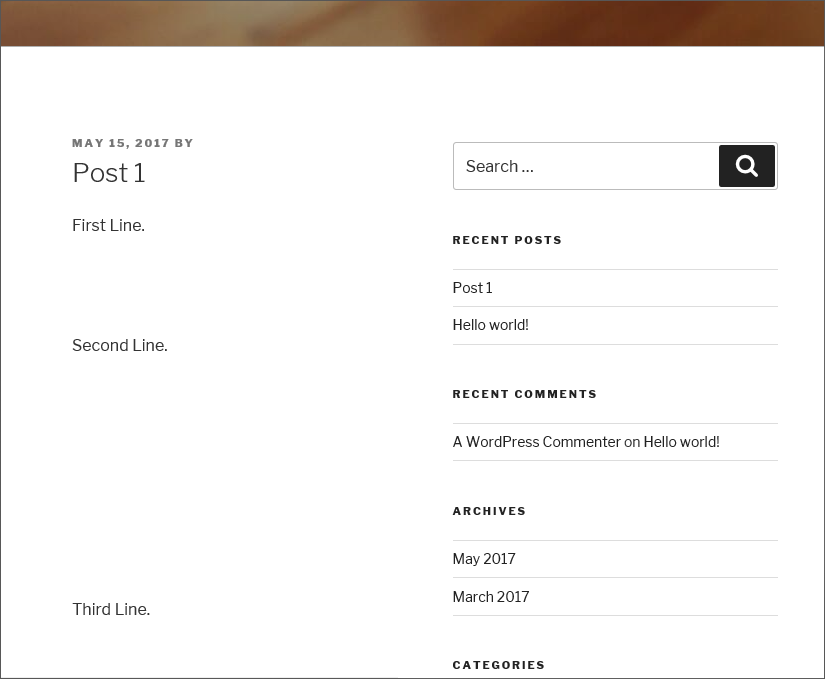
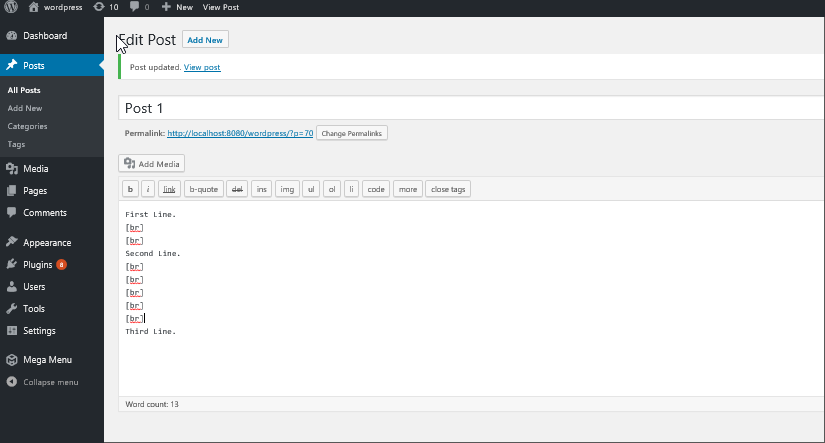
[br]
Adding Shortcode in Text Editor
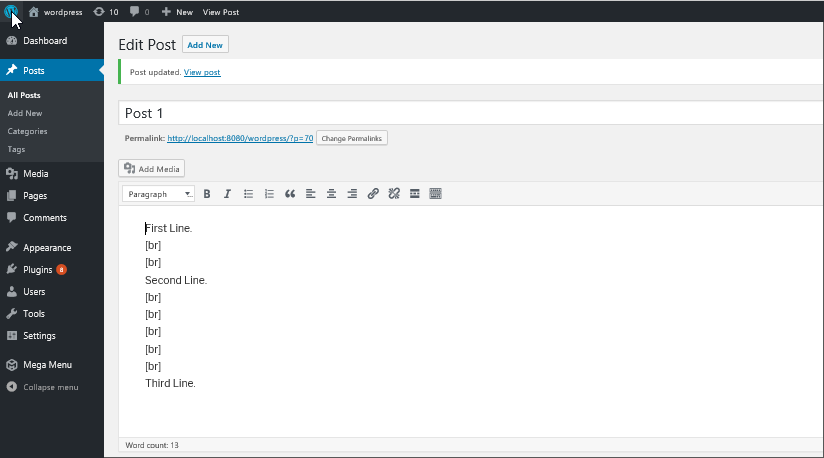
Edit Post in Visual Editor
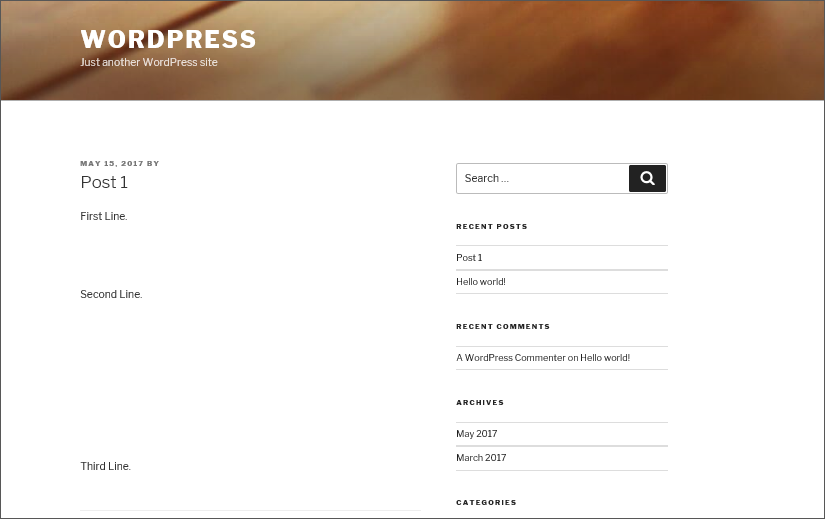
Published Post after Adding Shortcode
7. HTML Br tag not working – Use CSS
Some developers believe
tags should not be used for styling pages. HTML is a semantic language, not to be used for defining positioning, styling or layout information. Use CSS to generate the style or size of paragraph margins using stylesheets. If you have basic knowledge of CSS, then all you need to add paragraph spaces is add a bottom margin to the tag for the paragraph.
tags should not be used for styling pages. HTML is a semantic language, not to be used for defining positioning, styling or layout information. Use CSS to generate the style or size of paragraph margins using stylesheets. If you have basic knowledge of CSS, then all you need to add paragraph spaces is add a bottom margin to the tag for the paragraph.
- Open the WP admin panel.
- Select Appearance > Editor.
- Select the file style.css file on the right side. Locate the tag in the style.css file.
Add the following lines to add gaps above and below the paragraph:padding-top:1.0em; padding-bottom:1.0em;
Example:p { margin: 0 0 1.5em; }After adding those two lines, it will look like this:p { margin: 0 0 1.5em; padding-top:1.0em; padding-bottom:1.0em; } - Save the file.
All paragraphs get a space above and below. Note that this would add the same amount of space above and below all paragraphs.
Note: this article is taken from https://blog.templatetoaster.com/wordpress-line-break-not-working/
Comments
Server Management Company in Delhi